My Homelab: Exploring Three

Proxmox Nodes
In the realm of home labs, the pursuit of building and experimenting with various server configurations is a passion shared by many enthusiasts. In this article, I'll take you through my personal homelab setup, comprising three Proxmox nodes, each serving a specific purpose within my network infrastructure.
Node 1: N-Serv001
Specifications:
- Processor: Intel Core i7-3770s
- RAM: 16 GB
- Storage: 3 TB
- GPU Passthrough
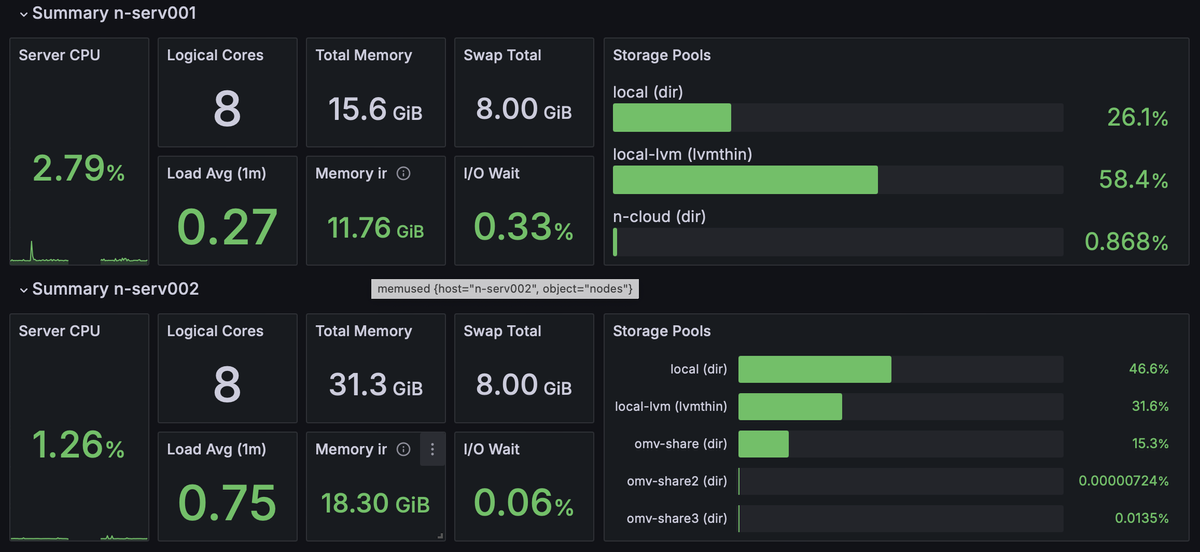
Node N-Serv001 serves as the backbone of my homelab infrastructure. Equipped with an Intel Core i7-3770s processor and 16 GB of RAM, this node handles general computing tasks efficiently. Its GPU passthrough capability enables me to utilize hardware acceleration for specific workloads, enhancing performance where needed.
Node 2: N-Serv002
Specifications:
- Processor: 8 x Intel(R) Core(TM) i7-4770S CPU
- RAM: 32 GB
- Storage: 6 TB
- Additional Features: Media Server (Jellyfish)
Node N-Serv002 is the powerhouse of my homelab, boasting an impressive 8 x Intel(R) Core(TM) i7-4770S CPU and 32 GB of RAM. This node primarily functions as a media server, hosting Jellyfish for streaming and managing multimedia content throughout my network. With its ample storage capacity of 6 TB, N-Serv002 ensures seamless access to my media library.
Node 3: N-Serv003
Specifications:
- Processor: Intel(R) Core(TM) i5-6260U CPU
- RAM: 8 GB
- Storage: 500 GB
Node N-Serv003 rounds out my homelab setup with its compact yet capable configuration. Featuring an Intel Core i5-6260U CPU and 8 GB of RAM, this node efficiently handles lightweight workloads also hosts websites like my monitoring and also this Homepage and serves as a versatile addition to my network and also it efficiently handles monitoring tasks and serves web content without any hiccups. With 500 GB of storage, N-Serv003 provides ample space for hosting various applications and services.
Common Features Across Nodes
1. Cloudflared
All three nodes in my homelab are equipped with Cloudflared, enabling secure and fast access to Cloudflare services. This integration enhances the performance and reliability of my network infrastructure while ensuring optimal security measures are in place.
2. Tailscale VPN Subnet Router and Exit Nodes
Tailscale VPN serves as the backbone of my network connectivity, facilitating secure communication and access across all nodes. By deploying Tailscale as both a subnet router and exit nodes, I ensure seamless connectivity and privacy for all devices within my homelab environment.
In conclusion, my homelab setup encompasses three Proxmox nodes, each tailored to fulfill specific roles within my network infrastructure. From general computing tasks to media streaming and lightweight workloads, these nodes collectively contribute to a dynamic and efficient homelab environment.
Whether you're a seasoned enthusiast or just embarking on your homelab journey, the possibilities for exploration and experimentation are endless. With the right combination of hardware and software, you can create a homelab that meets your unique needs and fuels your passion for technology.
